Followers

Sunday, December 8, 2013

DIY Art Journals

I do not own a Cinch or a bind it all although there are many a times i find it extremely difficult to get by there but it also gives me the motivation to innovate and and come up newer ways to Craft Necessity being truly the mother of invention...
    So, this is an idea i have been toying for some time now and i do so love the look of tall books... i decided to go right ahead and create some...
    What you need:-

  1. a large artist sketch pad
  2. really sharp craft knife
  3. cutting mat
  4. ruler
  5. craft glue
  6. needle  i prefer a curved one)
  7. thread of your choice
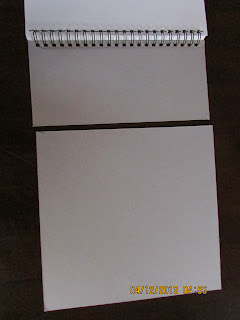
Here, is what i started with.


Now all you need to do s determine the width of the first book. I decided to make mine a 4" wide book. which would make it 12"x 4". as the length of the book is 12".


 Also, cut the back cover to size.

For  the front cover i simply cut it at 8" and then folded it over to create a pocket.


Here, is the first one. all done.

For the second its a little complicated not so much if your into Coptic stitching i am recently getting into the groove of it all. But here is how I started.
 Start by scoring all the pages down at the middle. The book had 50 pages so I stacked them in sets of 5 so that way I had 10 signature.


    I punched 4 holes in to each signature. The back cover of the book was a thick chipboard and i had enough leftover so I cut it down to the middle and made two covers for the front and back.
    I also trimmed the signatures to measure 12"x 4".
There are several videos on Coptic stitch binding tutorials so you follow them.. My favorite one is the following 

Here is the final result


 I punched holes to the cover corresponding to the signature and added eyelets . I had also spray painted the covers white.

Here, they are they are perfect for journaling and painting . They can be incorporated as art or dream journals and i also wanna do a lot of painting in them.

Hope you enjoyed. 
If your interested in purchasing my work kindly drop an email.
ashmitaroydas@gmail.com

Ciao
Ash

Tuesday, June 4, 2013

Dollhouse Dartboard Tutorial

My latest project is for father's day and i am creating a lot of vintage looking masculine objects to fit into the scene. Here, is one of my favorite ones. A miniature dartboard with a knife stuck into it.

Materials used
  • Cork
  • Coloring inks in red and white
  • Distress ink - Vintage photo
  • Balsa wood / match stick
  • Silver brad with long prongs
  • Small hook
  • Glue
  • Wood Crafting tools 
1. Cut the cork to the desired shape and add the little hook at the back .


2. Paint the rings using the colors you desire i use inks as they provide a stained effect which looks very vintage and worn. I painted my rings white and red. After that was dry I inked the edges using the distress ink stamp pad..


3. For the knife I took a little piece of balsa and a silver brad with long prongs. I cut the balsa to the size I wanted and lightly sanded it.


4. Cut the brad like you see below basically to resemble a knife blade or what ever shape you wish to create. Towards the bottom i cut a little notch sort of protrusion , this I will insert into the balsa. 


It was so tiny and glinting so much i couldn't get a better photo.  But you get the idea.


5. Insert the notch with a little glue into the handle you have created. The balsa i am using is very soft so the metal pierced right into it I didn't have to cut it separately, this step may vary if you use different materials.


6. I used the Distress ink stamp pad in Vintage Photo to stain the balsa handle its just perfect I  am so Proud!!


Here they are side by side


7. To finish it off just add a little dab of glue at the tip of the blade and pierce it into the cork and viola you have your own Dart board and knife!!


Saturday, May 25, 2013

DIY Floorboard tutorial for Doll Houses

Gel This is a really simple way to make floor boards and give them a shabby chic look not the dark teak wood floor boards from my earlier tutorial.

So, here is what you will need

MATERIALS NEEDED
  1. Popsicle sticks
  2. Coloring ink-White
  3. Gel Medium
  4. Glue
  5. Nail File
  6. Paint brush
  7. Exacto knife
  8. Rule
  9. Pencil


1. Start with the number of sticks you will need roughly place them on the area you would be covering and then a couple extra just in case.. 2 extra usually works for me. Then i take the nail file and file on one side of the stick. You need to file only one side because obviously the other side will be glued down.. You could also use sand paper for this part if that's what your comfortable with. We sand the surface as it brings out the grain even better.


2. I then paint all the sticks on the side i have sanded. This stage requires patience, i use coloring ink as it soaks through the sticks and gives a beautiful realistic stain it is not glossy so it just colors the wood which looks quite natural. You need to apply several coats, and wait between each coat to dry i painted 4 coats. You can alter the number of coats as per your need.


3. Next using a ruler and pencil i marked the sticks at 2" and the cut them.. Some i cut at 1".. Use a sharp cutter and be very careful!!


4. Below you see the floor of the shadow box i am making and these little beauties are going to be the floor boards. Alternate the pieces like a real floor as you see below. I start with the 2" piece and then for the next line i use the 1" piece first and that gives me the hatched look.


5. Here is the floor piece assembled finished floor. To finish it of i give the entire thing a coat of gel medium. It sort of looks like you polished your floor. You can skip this if you want natural woody looking floor..


Hope this was helpful... leave a comment and join me again for more...

Ciao 
Ash

Miniature Magazines for Dollhouse


So, here is a fun fast and super easy way to make miniature magazines for your doll houses or shadow boxes..

MATERIALS NEEDED
  • Photo glossy paper
  • Color Printer
  • Glue 
  • Paper cutter
  • Ruler
  • Old postcards
  • Scoring board
1. I downloaded the image of the covers from the internet. A tip for you guys here when you are searching go to the settings on top and select LARGE images this enables you to download images that have high pixel rate.. which gives you better quality images when you print them.

    I wanted mini National Geographic Magazine so I chose the ten best covers over the 50 years. And downloaded to my computer, then I copied the images to Microsoft Word Document and right clicked on the image and selected size. In the length I chose 1.05" the breath gets adjusted on its own and i suggest you not mess with it as to get a proper image.
    So, here you see my covers printed on a Glossy photo paper as you can see I left space in between, you will see why in a bit.


2. Using a Score board score as close to the edge of the cover and then at 1/8" to form the binding. And then I cut the individual pieces, using the blank part as the back cover. see below.


Click on the image below to get a better look at the cover and the score lines.


3. To make the inside pages i stacked together some old postcards I had lying around and when I was happy with the thickness which fit the binding I glued the edges with some good glue. this ensured the postcards stayed together and they looked like pages . Then I glued on the covers on the postcards and wrapped the back cover around .


4. Lastly I took a metal ruler and a sharp cutter and trimmed around the cover to cut out the little magazine. You can see the result below.. I did not ink the edges as I wanted then to be bright and white like they usually are and they look very very realistic although I do say s myself..


Please do try it ... hope you liked the tutorial ...

Ciao
Ash

Saturday, May 18, 2013

DIY Dollhouse flooring with craft sticks

Hey guys here's another tutorial actually just some instructions of how i did the flooring for the Office Shadow box. 

MATERIALS USED
  • craft sticks/ Popsicle sticks
  • Coloring Ink in brown
  • Ink Pad brown
  • Gel Medium
  • Glue
  • Ruler, Pencil, cutter
I first sanded the craft sticks on one side to smooth out the surface this also brings out the natural grain of the wood.

Then i stained them with the coloring ink since i wanted a teak look i used a complimenting color. i use coloring ink on craft sticks because they stain them perfectly and u don't have to use a lot of  it.

Next i cut them up into 2 inch pieces and inked the edges with the stamp pad. This is the result.....


I used some very strong glue and started to lay down the pieces like you would actual floor boards in a tile effect. i used the 2" pieces first and then cut small pieces to fill in the rest of the gap.


After that was dry i went over the entire base with gel medium, it was one even coat and have to let it dry very well, the gel medium gives the boards like a faux wax effect. It looks so real.


Here, it is the finished look in the daylight. i love it!! it actually looks like real teak floor.


Saturday, May 4, 2013

Framing a miniatiature ancient map

I made this miniature picture frame with a little map in it. 


Here, how i did it.

Materials needed
  1. A picture/photo of mini  map.
  2. White Card-stock 
  3. Matt-board
  4. Acrylic sheet
 1. Cut out a frame out of the matt board which is about 1/8th of an inch thick. I should be a little larger  than your photo. Color the frame using using paint of your choice. i used a gold paint pen and attached it to an acrylic sheet and cut it out. 

Cut out the image you want to frame.. maps, photos, pressed flowers, images etc.


2. Attach the photo on a piece of white cardstock. As you can i had cut mine from an old atlas so you see the text from the page on the back!!


3. Next i drew an outline of the frame on some white cardstock...


Using a ruler i drew a smaller frame inside the outline i had drawn.


4. Then i drew diagonals and joined the opposite corners of the inner rectangle.


Next i cut out on the diagonal lines using an exacto knife and ruler.


5. I then i used the embossing tool with the smallest head, i traced the inner rectangle.


6. Fold over the flaps on the embossed lines you created.


Like this...


7. Glue the frame on the card stock frame you just created and trim off the excess, you will be left with something like this...


8. Now, glue the map piece under the frame like so..


Trim the excess around the frame. Here, is the final result. I think this type of framing is called double framing. This is an easy way to create the look of a double frame... I love how it turned out..


Hugs and kisses
Ciao 
Ash