Followers

Showing posts with label Dollhouse. Show all posts

Tuesday, July 4, 2017

Itsy Bitsy Guest DT Project

Namaste guys

Itsy Bitsy is one of the oldest  craft store in India and recently they have come up with handmade flowers! I was really very excited when I was approached by them to do a GDT post!!
These flowers are delicious!! just loved the colours and the textures!

When I opened the package guess what the colours went really really well with Prima papers in this case I a using Tales of you and Me!
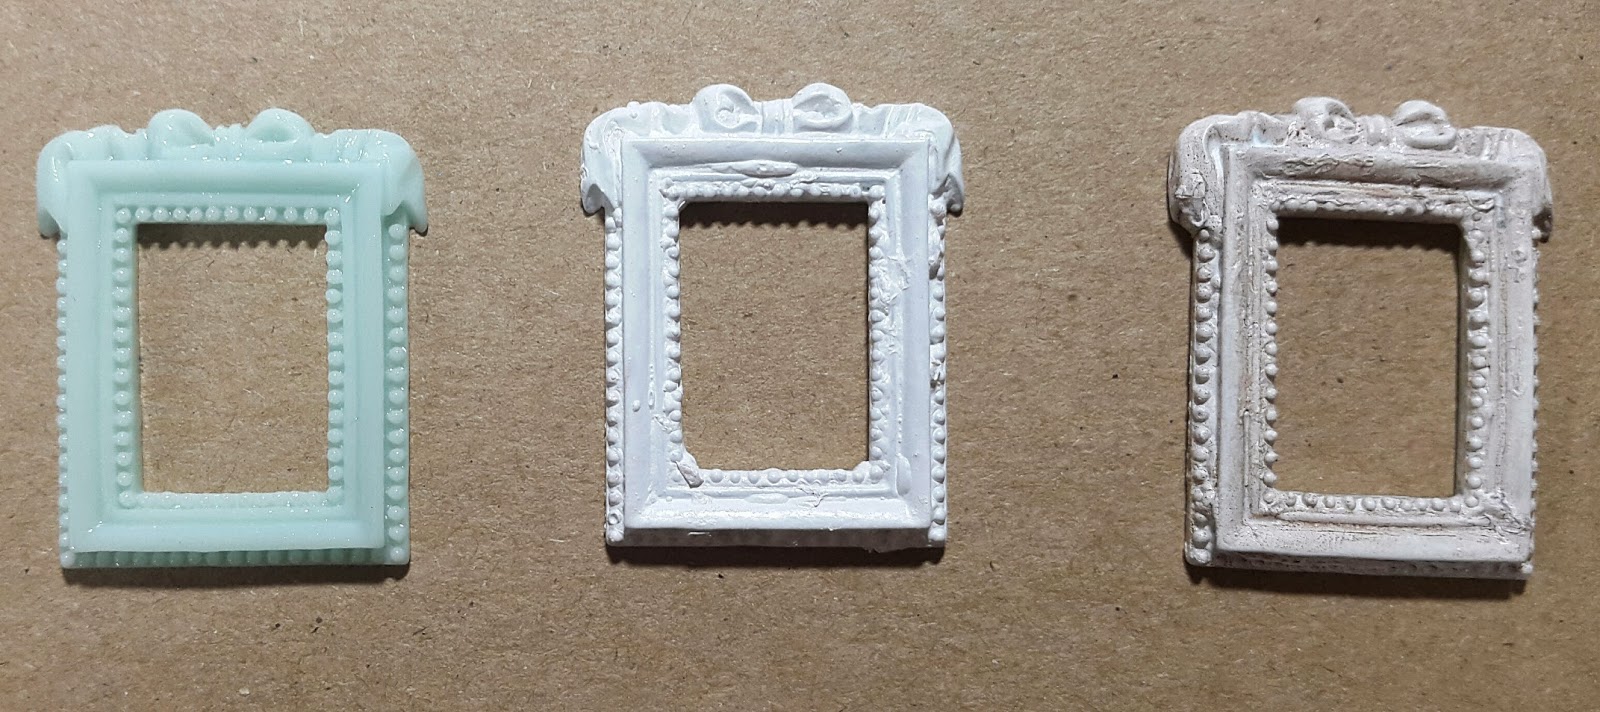
I have created a shadow box layout with the pattern paper and a very very old photo of me which was taken by an analogue camera , you knwo they one where you tool the reel to be washed to develop! So I used this gorgeous frame also from Isty Bitsy painted it and added my photo .


Do hop on over to their store for thees yummy products itsybitsy!

Products list

Thanks for visiting .
Don't forget to subscribe
Ciao

Ashmita Roy


Wednesday, February 11, 2015

Diy Resin Embellishments

Hello everyone

Are you all ready for some ice resin fun.  I want to share with you all some more projects using ice resin. And to make it more fun i will combine them with various mediums.

Here is a detailed start to finish video of how to make resin embellishments on your own .


And here is what i have created with my resin embellishments. A shabby chic altered clock for valentines day.
I have used the Prima Fairy Rhyme collection and tons of mulberry flowers, leaves and pearls. And the resin pieces i created during the video above.


Thanks for visiting 
Don't forget to subscribe

Ciao 
Ashmita Roy

Wednesday, November 5, 2014

Parisian Cafe in a Lantern

Bonjour!!

I am back with a totally amazing project, although I do say so myself.. So, many of us wish we were born in Paris or lived there or even visited !! Sigh!!! I love anything Parisian!!!
And i love my miniatures! So, I have created a Miniature scene of a little Parisian Cafe! It has lots of little details see if you can spot them all. I bought this Lantern A few months back when i was doing up my house and its basically a candle holder , but I loved the Vintage old world charm .. It's been sitting on a shelf in my living room since then Till i had a light bulb moment and thought of transforming it into a Room Box/ Miniature Scene.


I am entering this Project for the current Challenge at  Try it on Tuesday - Handmade/home made . It's just perfect for it !! Although I do say so myself!!

Here is what it looks like.


And here is what I did!!


Watch the Video here!!


Supplies used

Darice Miniature Chairs


In keeping tune withe Parisian theme I wanted the Chair to be nice and bright so I painted it using some Fired Brick Distress Stain. I did 3 coats and used my heat gun between each coat to give it a aged look and wiped off here and there with a wet baby wipe. 

Miniature Clock

This clock was perfect all I did was used some Walnut stain distress ink and inked it to get an aged and polished wood effect.


Miniature Photo Frames

These little frames are sea blue in color I used distress Paint in Picket Fence and i did three coats again drying between each coat with the Heat gun. And i wiped some of it off and then used walnut stain distress ink to get that weathered chipped effect.


And here they are with images glued on the back.


Eiffel Tower Charm


 I just took off the jump ring and the little Paris charm from the loop.

Bird Cage Charm


I just pulled at the cage and the base came off! I popped in a miniature Parrot and used E6000 to glue it back on.

Miniatures I made

I made a miniature French magazine


The Legs of the table the table top and the shelf are made using leftover chipboard from other projects. They have been stained with Broken China Distress stain

PS:- You can do this in anymedium!! You can take a Shadow box or Tim Holtz configuration box or alter any old jewelry box as well.

'
Thanks for visiting.
Don't forget to Subscribe!!

Ciao
Ashmita

Thursday, July 3, 2014

Shabby Chic Shadow box for mom

Namaste Guys

This is something I have been working on for quite some time apart from paper crafting Miniature craft is also a very fond hobby of mine. Is far more time consuming and intricate and demand lot of attention to details! But the results are always breath taking. So, my mom is all about shabby chic and pinks and lace so this is how in an ideal world (if there were a thing like that) Her room would have looked.

She loves home decor and reading and sewing and ironing clothes(can you believe that). So, I designed a room box with all of her favorite things that represented her personality.

I used a lot of beads and jewelry findings and charms(all purchased form istsy bitsy store at Delhi! 
Some free printables and pattern paper.
Matt board for the structures.


Watch the video here!!


I am Entering this project for the latest challenge up at -

Thanks for visiting!!
Ciao
Ash


Tuesday, June 4, 2013

Dollhouse Dartboard Tutorial

My latest project is for father's day and i am creating a lot of vintage looking masculine objects to fit into the scene. Here, is one of my favorite ones. A miniature dartboard with a knife stuck into it.

Materials used
  • Cork
  • Coloring inks in red and white
  • Distress ink - Vintage photo
  • Balsa wood / match stick
  • Silver brad with long prongs
  • Small hook
  • Glue
  • Wood Crafting tools 
1. Cut the cork to the desired shape and add the little hook at the back .


2. Paint the rings using the colors you desire i use inks as they provide a stained effect which looks very vintage and worn. I painted my rings white and red. After that was dry I inked the edges using the distress ink stamp pad..


3. For the knife I took a little piece of balsa and a silver brad with long prongs. I cut the balsa to the size I wanted and lightly sanded it.


4. Cut the brad like you see below basically to resemble a knife blade or what ever shape you wish to create. Towards the bottom i cut a little notch sort of protrusion , this I will insert into the balsa. 


It was so tiny and glinting so much i couldn't get a better photo.  But you get the idea.


5. Insert the notch with a little glue into the handle you have created. The balsa i am using is very soft so the metal pierced right into it I didn't have to cut it separately, this step may vary if you use different materials.


6. I used the Distress ink stamp pad in Vintage Photo to stain the balsa handle its just perfect I  am so Proud!!


Here they are side by side


7. To finish it off just add a little dab of glue at the tip of the blade and pierce it into the cork and viola you have your own Dart board and knife!!


Saturday, May 25, 2013

DIY Floorboard tutorial for Doll Houses

Gel This is a really simple way to make floor boards and give them a shabby chic look not the dark teak wood floor boards from my earlier tutorial.

So, here is what you will need

MATERIALS NEEDED
  1. Popsicle sticks
  2. Coloring ink-White
  3. Gel Medium
  4. Glue
  5. Nail File
  6. Paint brush
  7. Exacto knife
  8. Rule
  9. Pencil


1. Start with the number of sticks you will need roughly place them on the area you would be covering and then a couple extra just in case.. 2 extra usually works for me. Then i take the nail file and file on one side of the stick. You need to file only one side because obviously the other side will be glued down.. You could also use sand paper for this part if that's what your comfortable with. We sand the surface as it brings out the grain even better.


2. I then paint all the sticks on the side i have sanded. This stage requires patience, i use coloring ink as it soaks through the sticks and gives a beautiful realistic stain it is not glossy so it just colors the wood which looks quite natural. You need to apply several coats, and wait between each coat to dry i painted 4 coats. You can alter the number of coats as per your need.


3. Next using a ruler and pencil i marked the sticks at 2" and the cut them.. Some i cut at 1".. Use a sharp cutter and be very careful!!


4. Below you see the floor of the shadow box i am making and these little beauties are going to be the floor boards. Alternate the pieces like a real floor as you see below. I start with the 2" piece and then for the next line i use the 1" piece first and that gives me the hatched look.


5. Here is the floor piece assembled finished floor. To finish it of i give the entire thing a coat of gel medium. It sort of looks like you polished your floor. You can skip this if you want natural woody looking floor..


Hope this was helpful... leave a comment and join me again for more...

Ciao 
Ash